Adding a citation to an image
Note: Two years ago, The Legal Genealogist wanted to show off a favorite program, and so ran a how-to post rather than a why-to post. The question is how to save source citation information on an image, and have that information readily available.
We need a permanent way to keep the citation data on the image, and questions persist on how to do this. Saving the information to metadata (the hidden documentation of an image) won’t always work, because some systems strip the metadata out of an image when it’s uploaded, and it doesn’t necessarily transfer from computer to computer depending on operating system. Renaming the file with the complete source citation often makes the file name too long (although a short rename, such as 1850-UScensus-Cherokee-AL-D.Shew-Ancestry.jpg is a good idea).
So here’s a repeat of the post from two years ago today:
Reader Margel Walker Soderberg carefully read through the (March 2014) post about source citation and why we as genealogists should spend the time it takes to craft a good solid source citation.1 Then she raised a question a lot of people have:
I want to cite my sources correctly and I have tried but . . . Here is one issue I’ve had. Recently I was searching newspapers on the Chronicling America site when I found an article. I cut it out and saved it to the folder on my computer for that person. Even though the citation was listed as the top of the screen for my snip, it doesn’t show when I saved the file. Many of the online documents that I save are in jpeg format so how/where do I put the citation when I save them.2
She added that she’d tried inserting the image into a word processing file, but that didn’t help her find it later. She uses a thumbnail view to quickly scan the images, and all of the word processing documents show up with the same program logo instead of the image.
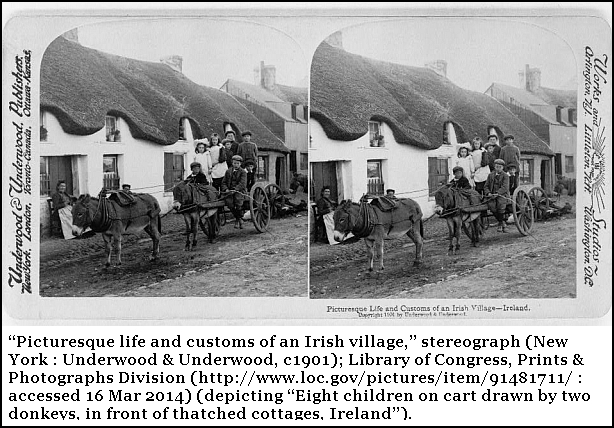
So… in honor of St. Patrick’s Day, the image we’re going to use for this little demonstration is this one:

It’s an image of a stereograph produced about 1901 of “Picturesque life and customs of an Irish village” and depicting “Eight children on cart drawn by two donkeys, in front of thatched cottages, Ireland.”3
But you don’t see any of that information on the image. How do we get it there to stay?
Enter the favorite program. It’s called Irfanview, it’s a photo viewing and editing program, it’s simple to use — and it’s free. (And yes, before you ask, it’s Windows only. But the steps will be basically the same in any basic Mac photo editor too — and, for that matter in any other Windows photo editor.)
And here’s how you use it to put your citation right on the image.
You take the image above and open it in Irfanview. It’ll look like this.
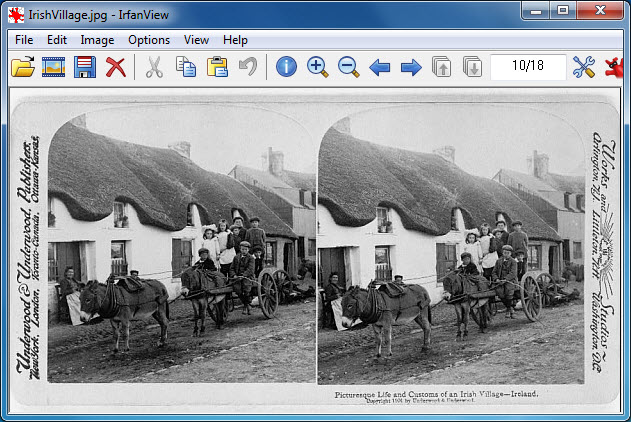
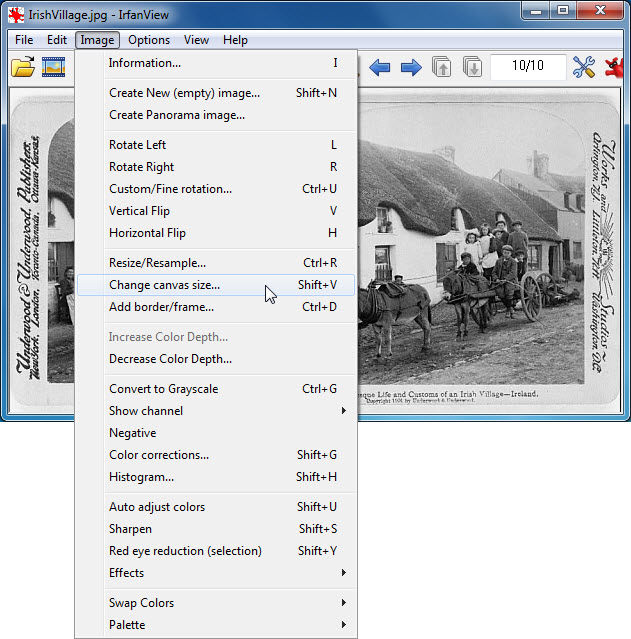
Drop down the Image menu and choose Change canvas size, here:
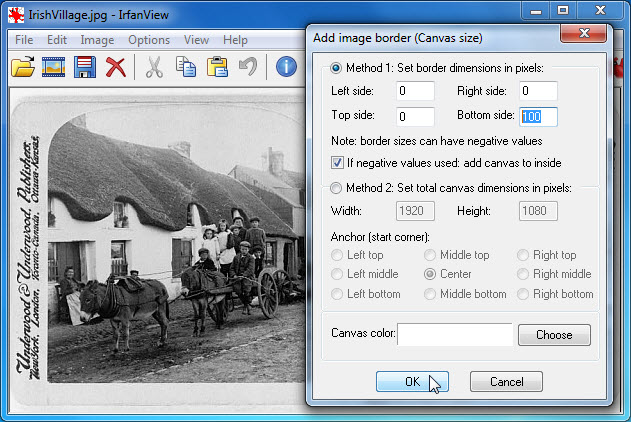
In the box that appears, add more space, measured in pixels wherever you want it — top, left side, right side. or bottom. Here, I’m adding 100 pixels of space at the bottom in a white canvas color:
Once I click OK, the image will look like this:
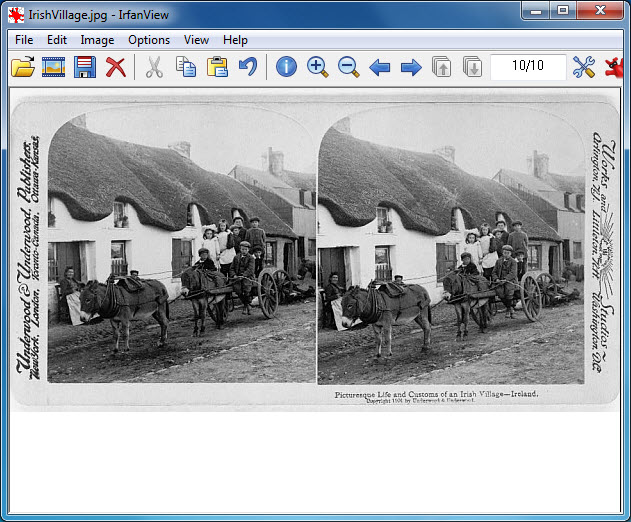
Use your mouse and select the area of that newly-added space where you want to add the text:
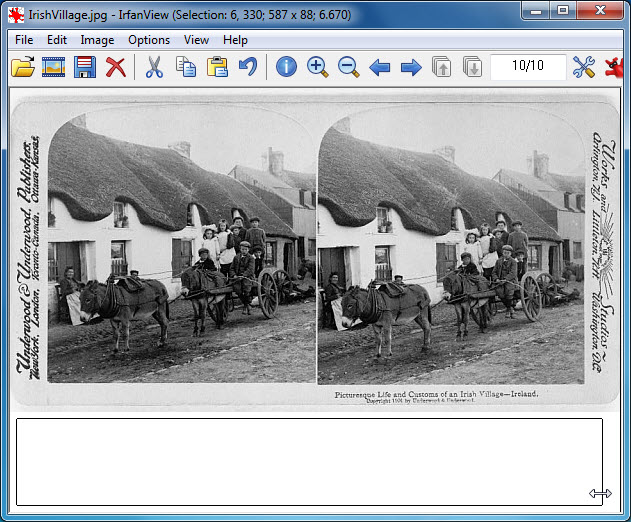
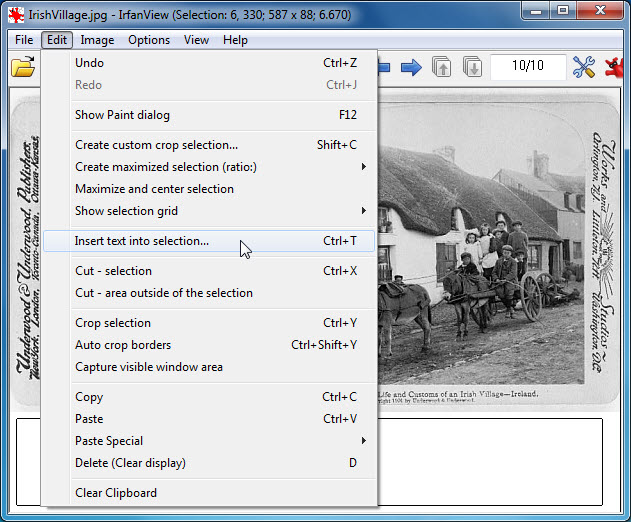
Drop down the Edit menu and choose Insert text into selection:
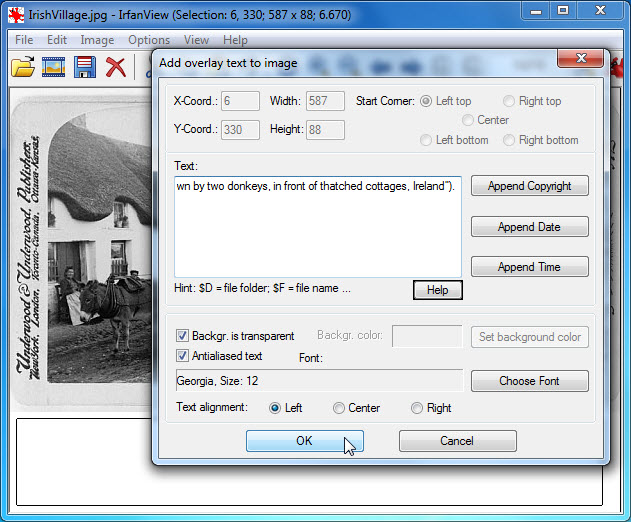
Choose your text options — I chose 12 point Georgia font in black — and paste your ready-to-go citation into the center box:
It’ll look like this when you click Ok…
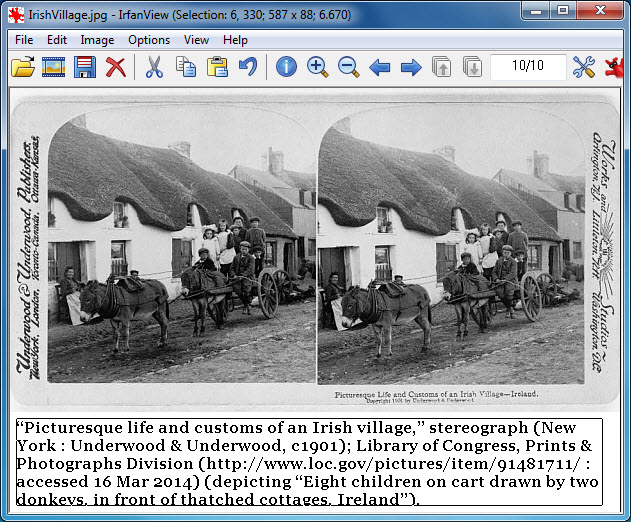
… and like this (I added the border to make it stand out) when you save the file.
All done — and you will never again have to worry about a citation not being with the image you just saved.
SOURCES
- Judy G. Russell, “A citation sigh,” The Legal Genealogist, posted 13 Mar 2014 (https://www.legalgenealogist.com/blog : accessed 16 Mar 2014). ↩
- Margel Walker Soderberg, comment to “A citation sigh,” posted 16 Mar 2014. ↩
- Image description, “Picturesque life and customs of an Irish village,” stereograph (New York : Underwood & Underwood, c1901); Library of Congress, Prints & Photographs Division (http://www.loc.gov/pictures/ : accessed 16 Mar 2014). ↩


Great tip. Thank you.
Great tip. I’ll have to find a Mac program, but this is great information.
Another popular free photo organizer/editor is Picassa. You can add a caption but to have the text with the image, follow these steps:
1) Open image in Picassa
2) In the editing toolbar, select the right-most list of effect tools and chose the “polaroid” effect.
3) Rotat the image using the slide bar under the polaroid effect and accept the change.
4) Choose the left-most list of editing tools (wrench) and chose the text tool option.
5) Draw a text box in the white space below the picture and enter you text and save.
Picasa may be popular, but it’s also been DISCONTINUED by Google: no future development or support. See this post from Google.
The software will continue to work, it just won’t be updated. The online interface will go away but the editing and organizing features will continue to work and it is compatible with Windows10 so it should be around for awhile.
What a surprise to find this wonderful column had been re-posted. I fell in love with this technique as soon as Judy mentioned it. It was exactly what I had been looking for. I would also encourage you to try your current photo program and find the “edit canvas” option. My simple Photosuite program does the same thing and just as easily. I am in the process of adding identification to many of my photos. I also like that I can put two photos in one file – such as the back of the photo! Then I put the text box underneath both. I also like to use it for large group photos – I put a small text box on each person with a number in it, then in the larger text box at the bottom, I write the number and the name of each person. I recommend this to all of my genealogy friends – and give Judy the credit! Thanks, Judy.
Thank YOU for the question in the first place!
Margel,
I like the idea of being able to put two images together, especially front and back of the same photo or document. That would save having to have two images for, say, WW II draft registration cards and risk getting them separated from each other. Is Photosuite free? And does it have facial recognition? Both of those are important issues to me. I’d spring for it if it were inexpensive, as long as it would do real facial recognition.
Thanks,
Doris
Putting two images together is easy using the same system: just add more canvas and copy and paste side two into the newly created space. But I can’t help on the face recognition part; that’s not a feature I use.
Photosuite came in a bundle of software from Roxio, so it wasn’t free, but I purchased it so long ago, I don’t remember much about it. It is a very simple program so I am sure there is no facial recognition but I never use that feature. I am sure that many programs can “edit canvas” and add text. You just have to find out where it is in your program.
This is the perfect solution for photo identification AND source citations for all those document jpgs.
Judy,
Irfan sounds like a great way to keep source info with the photo or other image. It could even help with those long lists of identifying everybody in a family reunion picture. I’m currently a Picasa user, and it’s not good for that at all. Would Irfan work as a substitute for Picasa? Does it do facial recognition? I’ve a few thousand pictures by this point and the idea of really starting over is very daunting. At this point I’m the ostrich with my head in the sand ignoring the problem of Google withdrawing support. It’s not that I’ve been a 100% fan of Picasa, but it works more or less and it’s free.
Doris
I don’t think Irfanview does facial recognition, Doris, but everything else should be just fine. There’s support and information on the Irfanview website.
Lady…you just all kind of smart!! This is great. Works like my Picasa did but I don’t have to use the screen capture and lose any of the quality. I like this even better! Thanks Judy!
Glad I could help!
I do something similar for old family portraits I post on the Internet. I add a black border, and in the border embed text, usually the name of the individual. That way, as the photo get reposted it is always identified with what I know. I consider it the digital equivalent of labeling the back of a physical photo. I often use BreezeBrowser to perform this task. BreezeBrowser can batch process photos, adding a border and inserting the caption from properties I have already edited.
I love Breezebrowser and use it for other functions — but it’s not free.
Another wonderful use of the citation on the image comes from FamilySearch. If you look at an image at the bottom is a tab called information. Click on the word “information” and scroll down to the citation an click on the button “copy citation”. Paste this information into the text box as Judy used in the above example. You now have a permanent citation for this document. You can use the change canvas size if necessary as well. In addition, you can use the citations available on Ancestry.com. When viewing an image, click the left pointing arrow with bar on the right side of the page. Copy the source information and other information you need. Sometimes I have to edit it a bit, but you still have the citation available for pasting into the text box.
Just remember that the source info from any of the online services isn’t always going to contain all of the data we need for a good genealogical citation. So use it, yes, but be sure to track down any missing info!
Not sure what I did wrong…..thought I followed instructions to the letter, but the Irfanview tip didn’t work for me. I used an image from Ancestry, that I’d uploaded to Dropbox. Will check Irfanview help to see what I’ve done wrong. Using Windows 10 and Chrome browser.
I am so glad you repeated this excellent article. I have been using citations in metadata (that do not transfer well between Windows and my iPad); combined with overly long file names. I had tried to do this in Picassa, but it didn’t work for me. This is perfect for preserving precise citations for my digital images. Thank you!
Glad it’s working for you!
What is the best software to use to add a citation to the margin of a PDF document?
Acrobat itself is probably the best.
This is a super-helpful post. I’m no longer on the Windows platform, but when I was I looooved Irfanview. I made it my default media viewer over the one that came installed on Windows was.
I’m now on Mac, and to put citations on images I use a similar process to yours on GIMP, which is basically open-source (i.e., free) photoshop. There are versions of GIMP for Windows, Mac, and Linux, and it’s a very actively-developed piece of software. It’s a bit more of a complex program to use than something like Irfanview or Picasa, but if you have a basic familiarity with image editing you can definitely pick it up. The place to find it is at http://gimp.org.
I thought I followed the instructions exactly. I could not get IrfanView to insert any sort of text box in which to record the citation. This would solve a LOT of problems if I could. Is there someone, anyone who can talk/help me through it?
What version of Irfanview are you using, and did you install the Plugins (that’s necessary to use this system)?